
Are your photos appearing sideways or upside down when you insert them on to your Adobe PDF template? This actually means that the original photo is actually in this orientation.
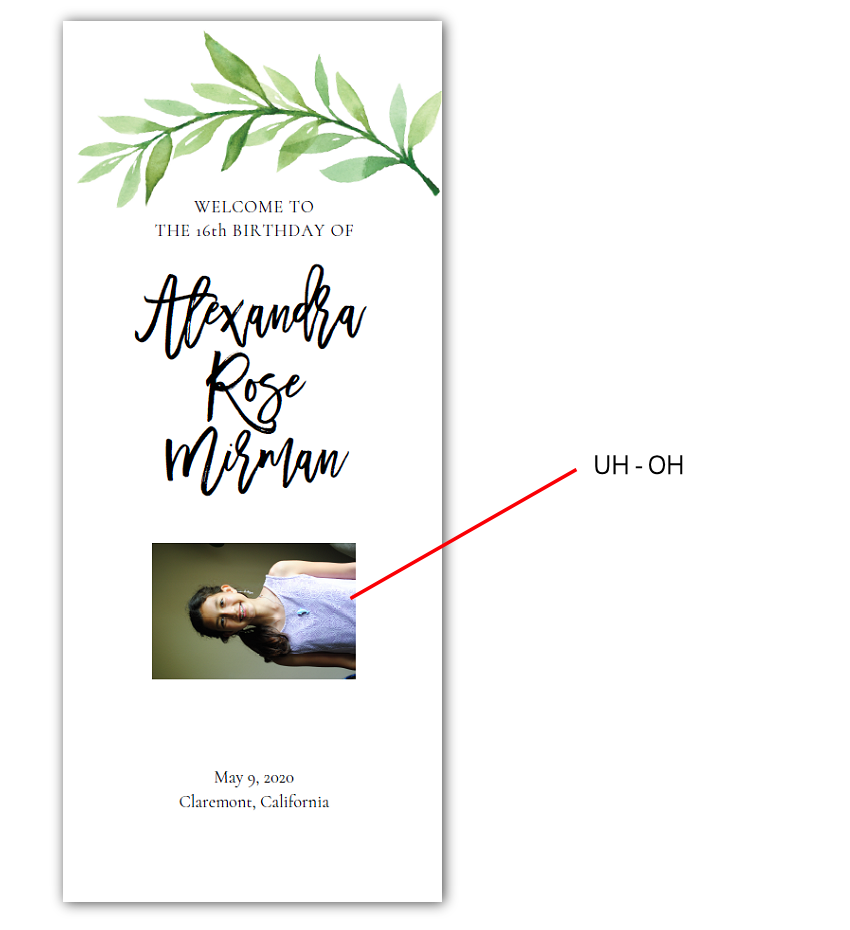
This happens to me when I flip my camera or phone to take a landscape or portrait photo and I hit the shutter too quickly before my camera could adjust the orientation. While our computer’s photo library and our smartphones may display a photo in the correct orientation even if it’s originally sideways, Acrobat Reader can not.
Acrobat Reader will display the photo in its original format. Hence, the sideways or upside-down photo. Good thing rotating a photo is easy to do!
If you are using your own favorite image editor, OPEN your image file and if your image is already displaying correctly on your computer, just SAVE the file as it is using a new filename. This makes sure the file is definitely saved in the correct orientation. You can then use this newly saved file on your template.
But if it’s displaying sideways or upside down on your image editor, rotate it and then save using a new file name.
If you don’t have a favorite image editor, I highly recommend using PIXLR.COM/X, an easy to use online image editing tool.
Let’s use the PIXLR.COM/X website for demonstration.
Using PIXLR, here how it’s done:
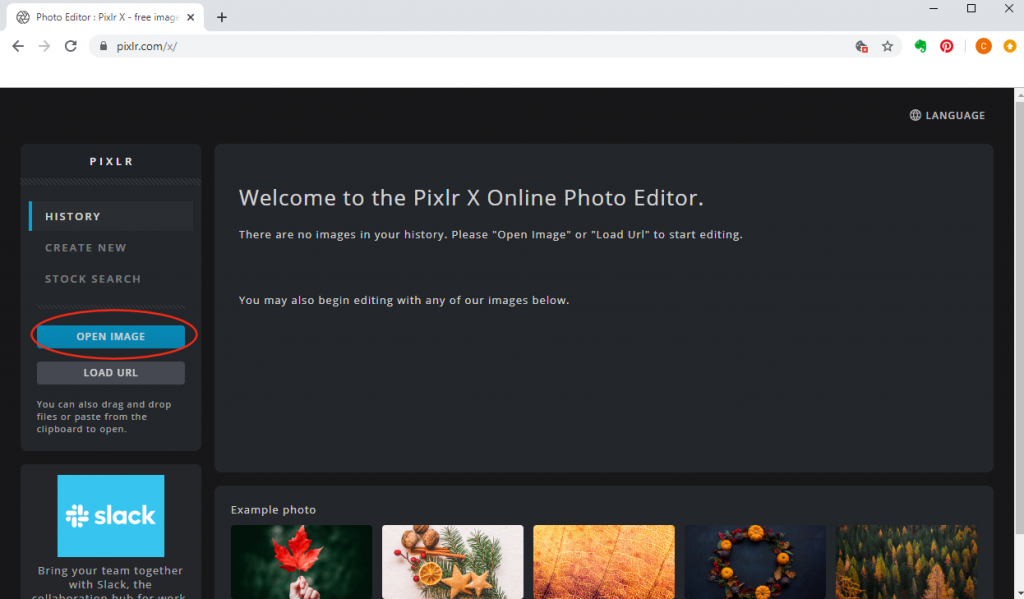
1. Click here to go to the PIXLR X website, or type pixlr.com/x on your browser. Click on OPEN IMAGE and a window will pop up for you to select your photo from your computer.
2. If your photo displays correctly, that’s great. All you need to do now is to click on SAVE (to ensure that you have the correct orientation) and then DOWNLOAD your file. SAVING at this point is an important step to make sure your photo is actually saved in the correct orientation. Once saved, it’s now ready to be used in your template.
3. But if you see your photo sideways, click on the PROPERTIES icon on the left panel. Then, on the ROTATE & FLIP section, click on the arrow to the right or left to rotate your photo and keep on clicking until it’s finally in the correct orientation.

4. When you’re done, click on SAVE and then DOWNLOAD it to your computer. You can now insert this photo in your template using Acrobat Reader.
That’s it!
……………..
Disclaimer: I am not affiliated with PIXLR and the opinions and tutorials are all mine. Also, PIXLR may occasionally update their website. If that happens, the screen shots in this post will no longer look exactly the same as the website after an update. However, PIXLR X is very easy to use and I’m confident that you all would be able to easily figure things out. 🙂